Forced Forsythia and Thank You

I am sorry about being late with my post this week.  Sometimes life just gets in the way!  I'm back and today I would like to tell you a little bit about a friend of mine and her unexpected and fun gift.

Nancy is a friend from my garden club.  I met her many years ago when I joined the group.  She is full of energy and, as I have discovered, a great gardener.  Once a year our club will hold a mini plant swap, just for our members. We all try to bring something from our gardens to share. Whenever I come home with something from Nancy's garden I know it is going to thrive in mine! I think I may have shared a few pictures of some of her plants in my previous posts or, perhaps, on Facebook.

At my last meeting, which was held at Nancy's house, she greeted us with these forced forsythia branches.  She often reminds us if the weather has been generous enough to give us three days in a row of above freezing temperatures{in late winter}, you can cut and bring forsythia branches inside your house to force them to blossom. Simply place the branches in a bucket of water and put them in a warm, sunny spot.  Thankfully, as often is the case, Nancy had already done all of the work for us!  Thank you, Nancy!
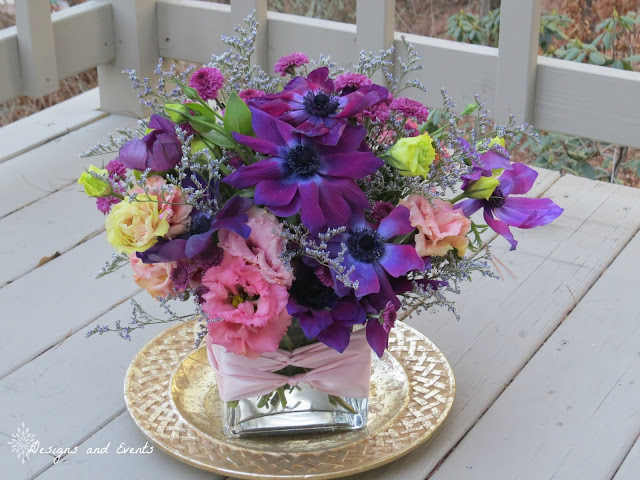


As you can see, the tulips were still closed when I bought them.
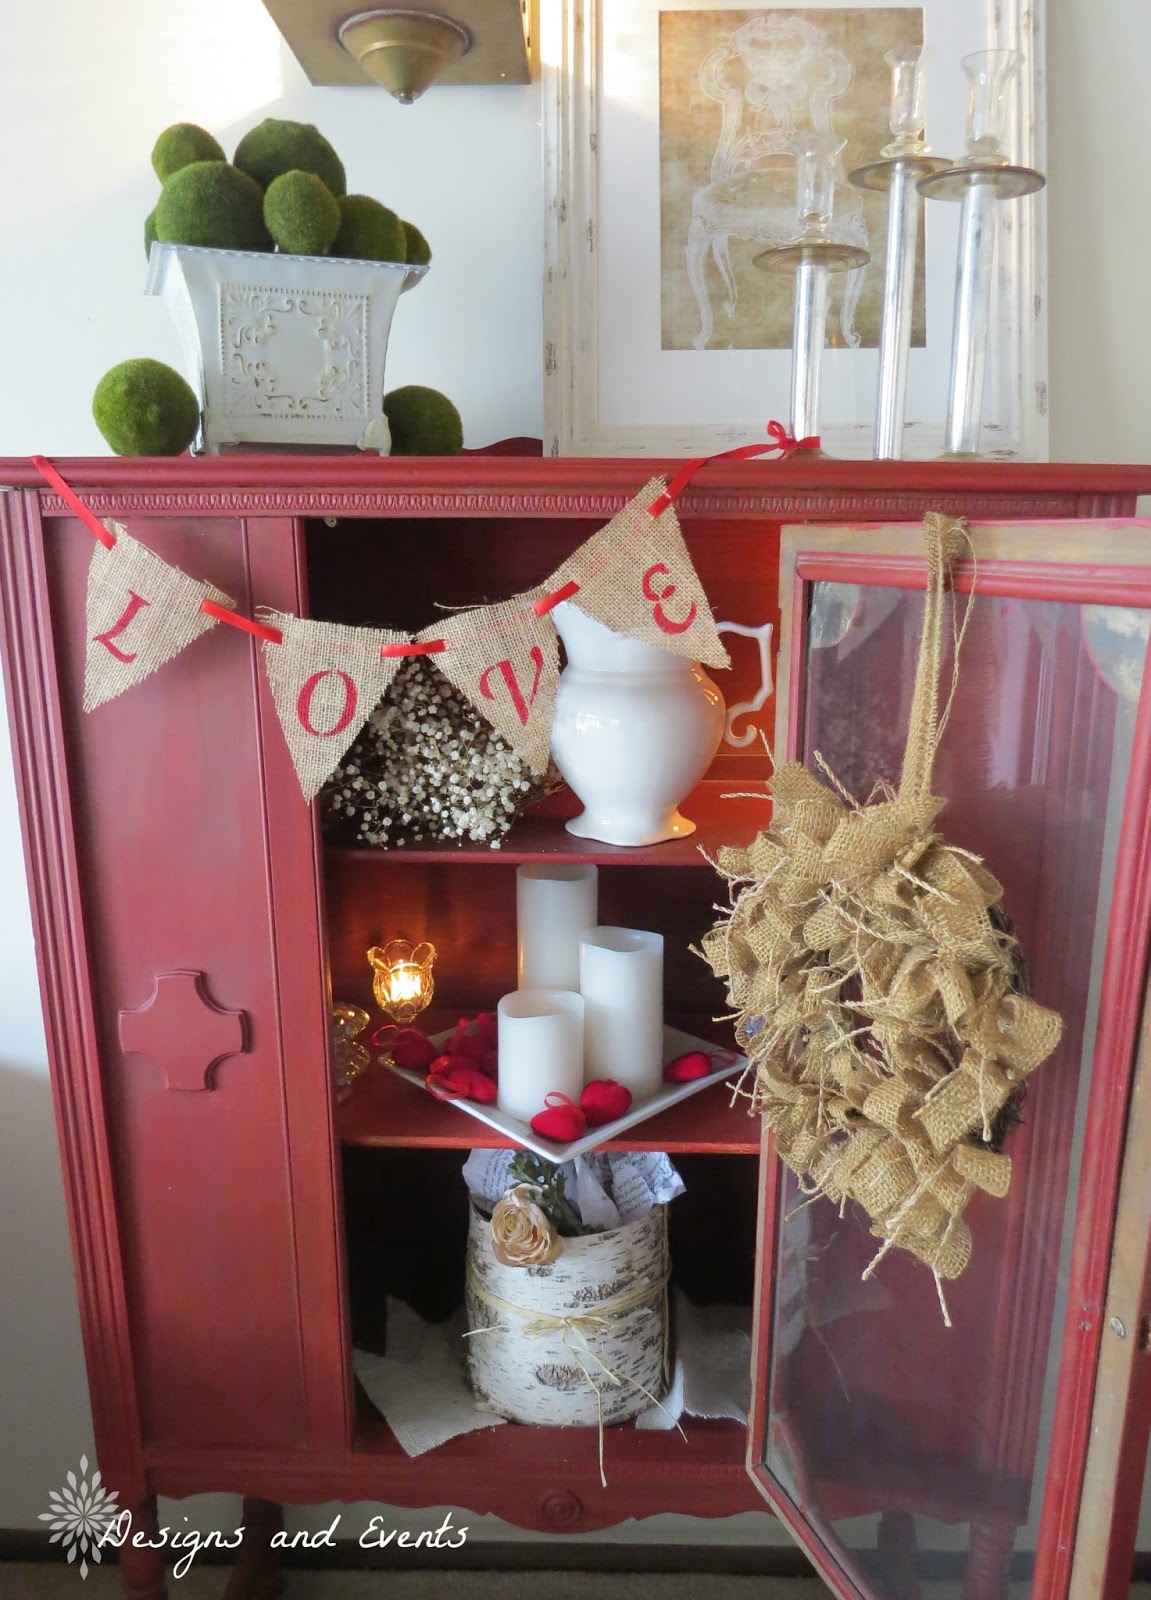
I had not planned to match the tulip color so well with the colors in the print above my buffet table but, it worked out nicely.
The next day the tulips had started to open and were growing towards the light, as they like to do.
So from the random act of kindness of my friend, Nancy, I was able to do one of the things I enjoy most in life...playing with flowers...while at the same time, I was able to bring a touch of spring into my home.  Thanks again, Nancy!!  Here's to random acts of kindness!


Linking With:
FindingSilverPennies
LoveofHome
Stonegableblog-The Scoop

Thinking Spring with Garden Roses

I have been infatuated with these corrigated zinc containers for some time now and I finally found them at my floral supply wholesaler.  Since I am always trying to practice my craft whenever I can, I thought, "Why not practice using these cute little tins?  You have to admit they are adorable!


I didn't have time for A LOT of practicing so, I decided to stop by Whole Foods to pick up some quick and easy flowers.  I purchased these pink and yellow garden roses, seeded eucalyptus, "regular" eucalyptus and waxflower.

Who could resist these beautiful garden roses?  Did you know they are sometimes called David Austin Roses?  Just beautiful!

My original thought was to make three mini arrangements using both the pink and the yellow roses but, as I looked at everything I thought better of that choice and only used the pink roses.  I thought the yellow would throw everything off.

 So, the first step, after putting some oasis in the containers, was to place four pink garden roses into each tin.  I only had 12 total so, that was the amount I used for each.  Normally, you would like to have an odd number of blossoms for your arrangement but, sometimes you just have to improvise.  I figured I could make it work somehow.
Next I added two spigs of regular eucalyptus to each tin and filled in the empty areas with waxflower and the greens of the waxflower.

 Last, but not least, came the addition of the seeded eucalyptus around the base of the flowers.  Seeded eucalyptus is so light and airy.  It's just lovely and the gray tone of the leaves looks nice next to the zinc of the container.
 Here is the trio.  I thought they were very dainty and old-fashioned looking.

*******************************************

Next came the question, "Where to put them in my house?"  Since I had been on vacation last week and had missed getting flowers for Valentine's Day, it seemed OK to keep them for myself this time :).


First, I tried the buffet in my living/dining room.  Do you see the piece of salvaged wood?  (It was on my dining table at Christmas.  You can see it here.)  I have relocated it to the buffet for a little while.  You know re-use, re-cycle...

I liked the arrangements there but, I also tried...

********************************************


them here on the dining table.  I had this nifty chalkboard and thought of writing, "Think Spring" on it.  Not original but, I am truly hoping for spring so it seems like the correct sentiment to express.


If you are wondering what happened to the yellow garden roses, I put them in a simple clear vase.  Why not enjoy them just as they are?  I love their ruffled little centers!  Now there are flowers all over my house and it's great!


Linking With:

Styling an Old Cabinet

Ok, I know the cabinet below needs a facelift and should be painted, preferably white.  I know it but, truth be told, I'm a little afraid of painting furniture.  I don't know what it is.  It could be the mess of it all or the finality of changing an old piece into something else.  I don't know.  I've been wanting to paint this cabinet for years but, the truth is, the color works OK at Christmas and with Valentine's Day around the corner, it kind of works now, as well.  Let's face it-it's red!  So, it looks like I will be putting off the inevitable a little bit longer!

 I packed away all of the Christmas decorations and started on my "winter white" theme, as you may know if you have read my previous post.  I started adding white elements to this old cupboard the other day.
 As it turned out, a trip to Home Goods was in order.  I found this framed white print there.  It certainly went with the winter white theme!
 I rummaged through the basement and found this white antiqued flower pot and filled it with moss spheres. I found those at Home Goods, as well.  I liked how the green broke up some of the white and introduced a new color to the mix.
The candlestick holders I have owned for years.  I seem to be able to use them time and time again.  I hope it's not just me who thinks they look nice here :).


 Don't you think white pitchers fit in everywhere?  It's hard to go wrong with them.

I added the taupe colored silk flower to the birch container.  The crumpled up printed paper alone appeared too bland to me without it.
 This burlap ribbon wreath came as a two pack from Ballards.   I have used them over and over again all around the house. 
 The baby's breath was easily dried and works well with the white pitcher.

As January ended and February started, I was tiring of only using winter white in the house. So, in honor of Valentine's Day, I added these red hearts for a more vibrant look. I was amazed at how quickly that one addition changed the whole effect.


 The lighted votive in the back was great for the photograph but, I couldn't let it stay lit for very long, fire hazard and all!  A battery powered votive would be a safer choice.

 Oh yes, and then I found this LOVE banner I had made last year for Valentine's Day stashed away in my supplies.  Voila!  My cabinet was ready for the holiday!

So here we have it, my old red vintage cabinet all dressed up for Valentine's Day.  Phew, I made it through one more holiday without having to paint it.  Maybe daughter Brittany will relent and paint it for me.  We all know it is going to take a lot for me to do it :)!

Purple Anemones for a Friend

Periodically, I like to go to a local farmer stand and buy some fresh flowers.  I say farm stand because I'm not sure what the correct term for the place would be.  It is more like an organic grocery store than farm stand but, for my purposes, we'll call it a farm stand.  I just love going there and looking at the assortment of cut flowers.  It's a great place for me to visit and become inspired.  The best thing is that this farm stand is only 20 minutes from my home, as opposed to the flower market in Boston, which is more like 45 minutes to an hour away, on a good day.  My daughter, Brittany, will go with me once-in-a-while, which makes the trip all the more fun.  Last weekend we went on one such excursion.  She and I had been doing some other shopping and at the last minute decided to stop by Idylwilde Farm in Acton to see what we could find... flower-wise. We found these beautiful purple anemones.  The color was so vibrant, I just couldn't resist taking them home.

We also found purple Sea Heather (It's the wispy stuff in the background.)...


Pink Lisianthus...

and purple button mums.  
Unfortunately, Brittany had to go home before we were able to play with the flowers.  I ended doing that the next day by myself.  I missed her but, it was fun anyway!


&&&&&&&&&&&&&&&&&&&&&&&&&&&&&&&&&&&&&&&

I thought dressing up the square 5" vase with this purple ribbon would add a little "zip" to my arrangement.  I decided on tying the ribbon in this twisty fashion. I think there is a name for this pattern but, I honestly can't remember it. 


I'm sorry I didn't take photos as I was arranging the flowers (in the zone, you know!) but, here is the end result.
I thought it turned out quite nicely.  The purple of the anemones was outstanding!

Here you can see the lisianthus and sea heather up close.  The sea heather broke up the solid purple of the anemones, which gave the whole look some extra dimension.
The yellow flowers you see here are really the pink lisianthus.  As they open and mature, they will turn pink.  Funny how they start out yellow.

There really is no reason to be showing you this photo except that I liked it.  The light exposure in my house was getting darker as they day worn on so, I decided to bring the arrangement outside to take more pictures.  I like the contrast of the flowers and the barren tree in the background.  I just love the colors of the flowers!  Brittany said this arrangement was one of her all-time favorites that I have made.  I'm not sure how to take that since I have made many more elaborate and fancy centerpieces but, I guess I will take the compliment, none-the-less  :).


As I looked at my finished product, I started to wonder if the purple ribbon made the arrangement too purply.  Is "purply" a word ?!  Anyway, I decided to change the ribbon color to pink to see how that would look.


I tied the ribbon pretty much the same way as I had with the purple ribbon.  The only difference was that the ends of the ribbon were tied in the back of the vase.

Here is the arrangement with the pink bow.  What do you think?  I ended up posting some photos of the centerpiece...some with the purple bow...some with the pink bow on Facebook and asked my followers which color they liked best.  Turns out the original purple was the color of choice.  However, before that choice had been determined, this bouquet was delivered to a friend of mine who had recently taken a fall.  My husband thought it might be nice to give the flowers to her.  I thoroughly agreed!  I only wish I had thought of it first! I hope she didn't mind the pink ribbon :).  

Linking With: