


Hey there! How's it going? All is well here. Last night we went to the high school graduation of my granddaughter Stella, which was very exciting. We are so very proud of her and look forward to seeing what new things life has in store for her!
In blogger news I am here to share some container gardens from my past with you. Along with the pictures, I hope to share some helpful hints as to how to have a successful container garden filled with flowers, vegetables or herbs, whatever your choice may be.

Containers can come in almost any shape, as long as they can hold soil and preferably have a hole where water can escape if it rains heavily or if you mistakenly overwater your container somehow. Plants tend to rot in those conditions so it is best to avoid them at all costs.
The traditional container, which is what I use most of the time, is a pot such as this one below. These pots can be ceramic, clay, plastic, metal or cement. There may be others but, I cannot think of them at the moment.
This container is the traditional kind where it has a thriller, filler and spiller. The spikey plant in the center and the dusty miller plants to the side of it are the thrillers. The fillers are the petunias, although they are spilling somewhat too, but the yellow verbena is the spiller I would say. I think this is the effect you would like to achieve in your containers, especially if they are going to don the front of your house.

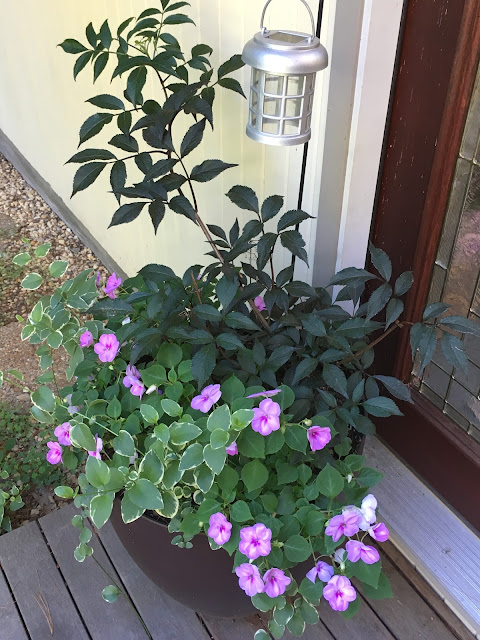
Here is another planter that follows the same idea of having a center, maybe spikey plant in the center with fillers and spillers going around the center plant. You can't go wrong with this game plan.

In this container I added a hook and solar lantern to add some functionality and whimsy to the planter.
Here is another "garden" that adds whimsy by way of the container in is in. This planter doesn't
have a center plant but it is dramatic, nonetheless.

Another way to add whimsy and fun to a container garden is to incorporate it into
a vignette of sorts. Here I placed one of our bikes adorned with American flags next to the
container as a way to celebrate July 4th.

At this point I would like to mention some good practices you should use when creating
your container garden.
1. You should always start off with the best soil you can find. Usually this means a potting soil mix for outdoor plants. I find that if you purchase a soil that has fertilizer mixed in with it, your results are astronomically better.

2. Purchase the best looking and most healthy plants you can find. Go to a garden nursery with a good reputation. If you go to Home Depot or Lowes, both good choices, just make sure the plants look healthy and are not broken or have mold or fungus growing on them.
3. Make sure you keep the container watered. Don't overwater but realize that containers dry out much more quickly than plants in the ground. If it is the middle of the summer with hot, hot temps, you may have to water a hanging basket container more than once a day. Just keep an eye on things. Other container gardens may need to be watered every day during the hot spells of summer.

4. Finally, even if you used soil with fertilizer in it, you might have to supplement the fertilizer with a liquid one as the summer progresses. This usually needs to happen halfway or so through the summer. If you did not use pre-fertilized soil at the beginning, you should water with fertilizer once a week for a month or so. This will help your plants flourish tremendously. I fertilize all the way through the summer but not as often as the summer progresses.

Another thing to know about container gardens is that they can come in all kinds of shapes
and sizes. This one below is a simple railing-hugging flower box with one
kind of flower in it. In this case, it is filled with geraniums.


