Hey there! Sorry it has been a while since I last checked in. I know I keep making this same excuse but moving and trying to make a new life in a new town seems to take a lot of time, at least for me. I can tell you I haven't been sitting on my laurels but, also, have not accomplished as much as I had hoped to in terms of getting settled in. However, in trying to get my new home decorated I did set out to make a silk flower swag to go over the bed in the main bedroom. I thought I would share that process with you today.
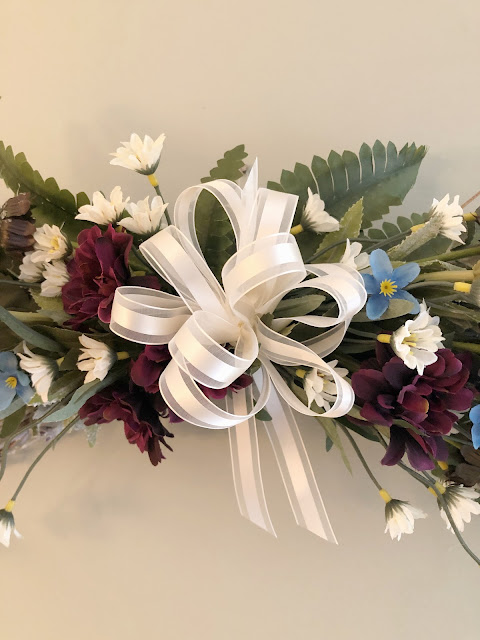
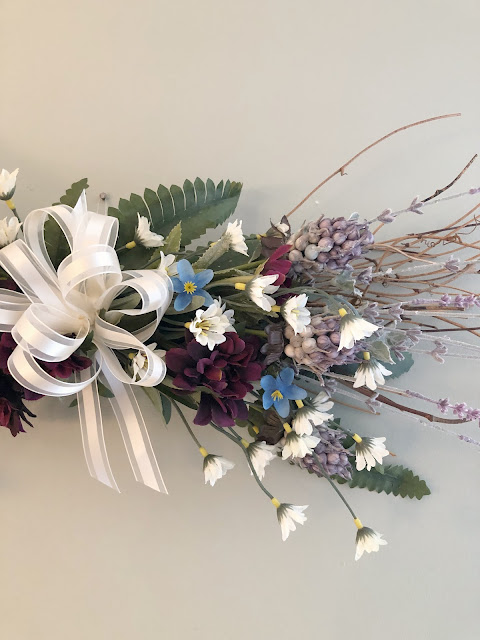
Here is a sneak peek at the result. The making of the swag is not all that pretty so I wanted to share a glimpse of a photo to keep you engaged and curious :).
In my last house I had made a swag for the bedroom that I loved but in moving had decided that it was time to donate it to Savers and start fresh in the new home. What I found was that many of the craft stores no longer sell what I consider to be a base for the swag so, I was happy when I found this one ↓ at Hobby Lobby.
I was also able to find some interesting silk flowers there, as well.
The swag, I determined, would be somewhat simple so I selected a small assortment of "flowers" and greens.
I had a painting that I had brought with me and was using it as inspiration in terms of colors for the swag. The painting would be hung in the main bedroom, as well, bringing continuity to the room. The painting has a touch of this blue in it so, I decided to add that color in also.
I apologize in advance for the messing photos. Since the move I have been delegated to using my husband's basement workbench area for my crafts. I gave up my beautiful studio at my old home. We have yet to build a new spot for me, so all of my creating is done with tools and gadgets all over the place.
Anyway, I began the swag by taking the lavender silk flowers and laying them outward from the center of the branch base creating the form for the swag. I wired the stems of the lavender to the willow base and put some hot glue on top of the wire to seal the lavender in place.
I also hot glue leaves from the fern pick and placed them underneath the lavender. This added dimension and also gave me more space in which to glue more flowers.
Next, I added in the "thistle" stems and glued where necessary.
I, then, added in the blue flowers and continued to work on the swag. Unfortunately, I forgot to take photos of this process but when I was halfway done I really did not like the look of the product at that point. So, I cut out the blue flowers, went to Michaels and purchased some white/cream silk flowers and started somewhat over again.
I liked the more neutral look of the cream-colored flowers mixed into the swag.
.jpg)
Next came adding in the burgundy flowers. I cut individual flowers from the stems and hot glued them in place. The swag was coming together. I think I stopped taking tutorial photos at this point. I hope you can get an idea of how it progressed by the finished pictures.
In the end, I decided to add "just a touch" of the blue to give the swag a pop of color.
I made a bow out of ivory ribbon and attached it to the swag with wire tied around the back of the base.
Here you can see more of the "touch" of blue.
And now the finished product, Ta Dah! I am embarrassed to tell you that I made the swag a little too small to go over the bed. I now realize that the old swag hung above a mirror in our old bedroom. The bed was in front of a window. Therefore, there was no place to hang anything. I forgot that fact and didn't factor in size when I was creating this new arrangement. Now I am seeking out a new spot for my new swag. Hopefully, it will end up in the bedroom somewhere since that was my intention but, who knows? I will keep you informed :).
Joining these Link Parties:


.jpg)
.jpg)
.jpg)

.jpg)


.jpg)


