Hello again! As many of you know I have been lamed up for five weeks with the flu and aftereffects of the flu. As I suspected, I was finally diagnosed with pneumonia last Friday. The recovery has been very slow but, fingers crossed, I feel like there might be a light at the end of this tunnel. So, as you can imagine, my productivity has been low. However, I did take on a craft project this week that I could quietly do while taking it easy. I am sharing the results with you today.
Every Easter season I seem to like to experiment with Easter egg design. I had seen one particular design on Pinterest that I wanted to try. I thought I would make a bunch of them and maybe give them away. More on that goal later. For now, I’ll show you what I did!
Since I have been housebound for so long, I had to use materials I already had in my home. The egg projects required only a few things, which was good. I needed Modpodge, sponge brushes, decorative napkins, a book or other printed material, ribbon, twine and some embellishments.
The eggs that I really wanted to make were made with Modpodge and strips of cut-up printed pages. As I said, I had set out to make at least 6-9 of them, maybe more.
As I got into decoupaging the strips of paper to the eggs, I found it was extremely messy, and it was hard to cover all of the eggs with the strips. I should have started with white eggs but, I did not have any of those. Every spot on the eggs needed to be covered with paper. This made for thickness in some areas of the eggs. I was exhausted after making three of them. That could have had something to do with my illness but, I also determined that making these eggs took a tremendous amount of patience, at least for me anyway. So, if you try them, give yourself time and put on some soothing music :).
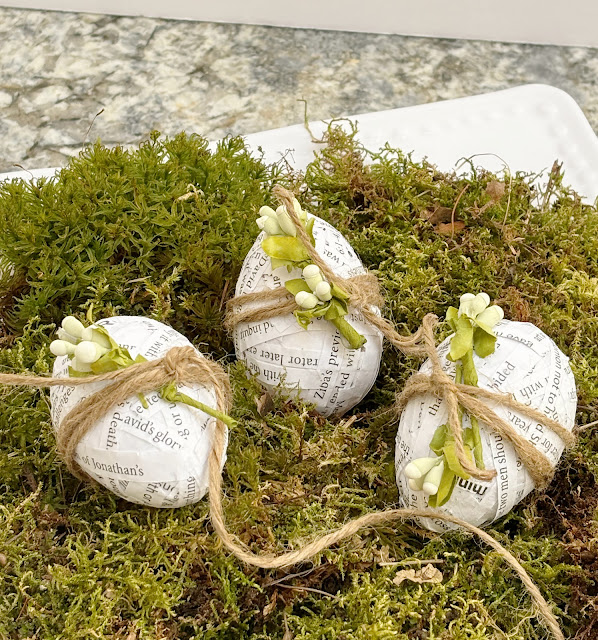
The eggs did come out pretty, however. I tied them with twine and inserted these spring-themed faux flowers. The moss is from my yard. I have a ton of it! Great for spring projects :).
You can see an interesting way I used moss here and here if you would like.
These eggs really are Easter themed eggs. I used a church workbook for the strips of paper
to cover the eggs. The wording reflects that.
I figured that was apropos for this project.
The next day I set out to make three more eggs. Only this time, I would use the torn paper napkin method I had used before. I decided to use the napkin with the bright yellow flower on it. I was going to use the Easter egg napkin also but, I ran out of steam. Maybe I will try making those eggs another day.
The trick with the napkins is you must first separate the layers of tissue in the napkin. Believe it or not, there are two layers of tissue in the napkins. They are tightly held together, however. I find it easiest to make a tear midway into the napkin from an edge and try to separate the layers that way. It is easier to find the layers once the napkin is torn. You don't need to go too far into the napkin which could jeopardize wasting the whole napkin all together. Once you separate the layers, slowing and carefully pull apart the two layers of tissue.
Because my hands and fingers were all sticking with Modpodge, I didn't take any pics while making the eggs.
The trick is to lather Modpodge on a quarter to half of the egg at a time. You should have already torn pieces of the napkin into strips or other shapes before lathering the Modpodge on the egg. Next, place the pieces of tissue paper on the wet Modpodge. Create a design or color scheme that you find appealing.
I found I also needed to wash my hands often to complete decoupaging. Otherwise, the tissue will stick to your hands, and you will get very frustrated. Modpodge is very forgiving and easy to wash from your hands. It is water based, which is a lifesaver.
They probably are my favorite.


.jpg)
.jpg)


.jpg)


.jpg)


%20(1).jpg)
.jpg)
%20(1).jpg)


These are all so pretty! I've been wanting to decoupage eggs, and I love that you showed different ways! I'll be featuring this at Thursday Favorite Things today. :)
ReplyDelete