Hi Everyone! How are you doing today? It is definitely feeling like November here in the Northeast. We have cleaned up the yard and put away any leftover deck furniture. It was time to do those chores. I have one more week of thinking about fall and fall colors but after that, I will be moving onto Christmas. I did a prelude to Christmas this week with a very simple but fun craft that I thought I would share with you. It gave me joy doing it and, hopefully, it will you too!
This craft is very easy to do, even if it is a tiny bit messy. It isn't expensive and you don't need a lot of supplies to make it. So here goes!
Originally, I was going to make a Thanksgiving votive holder but, I kind of felt that I was losing some of that Thanksgiving momentum so, I moved onto Christmas.
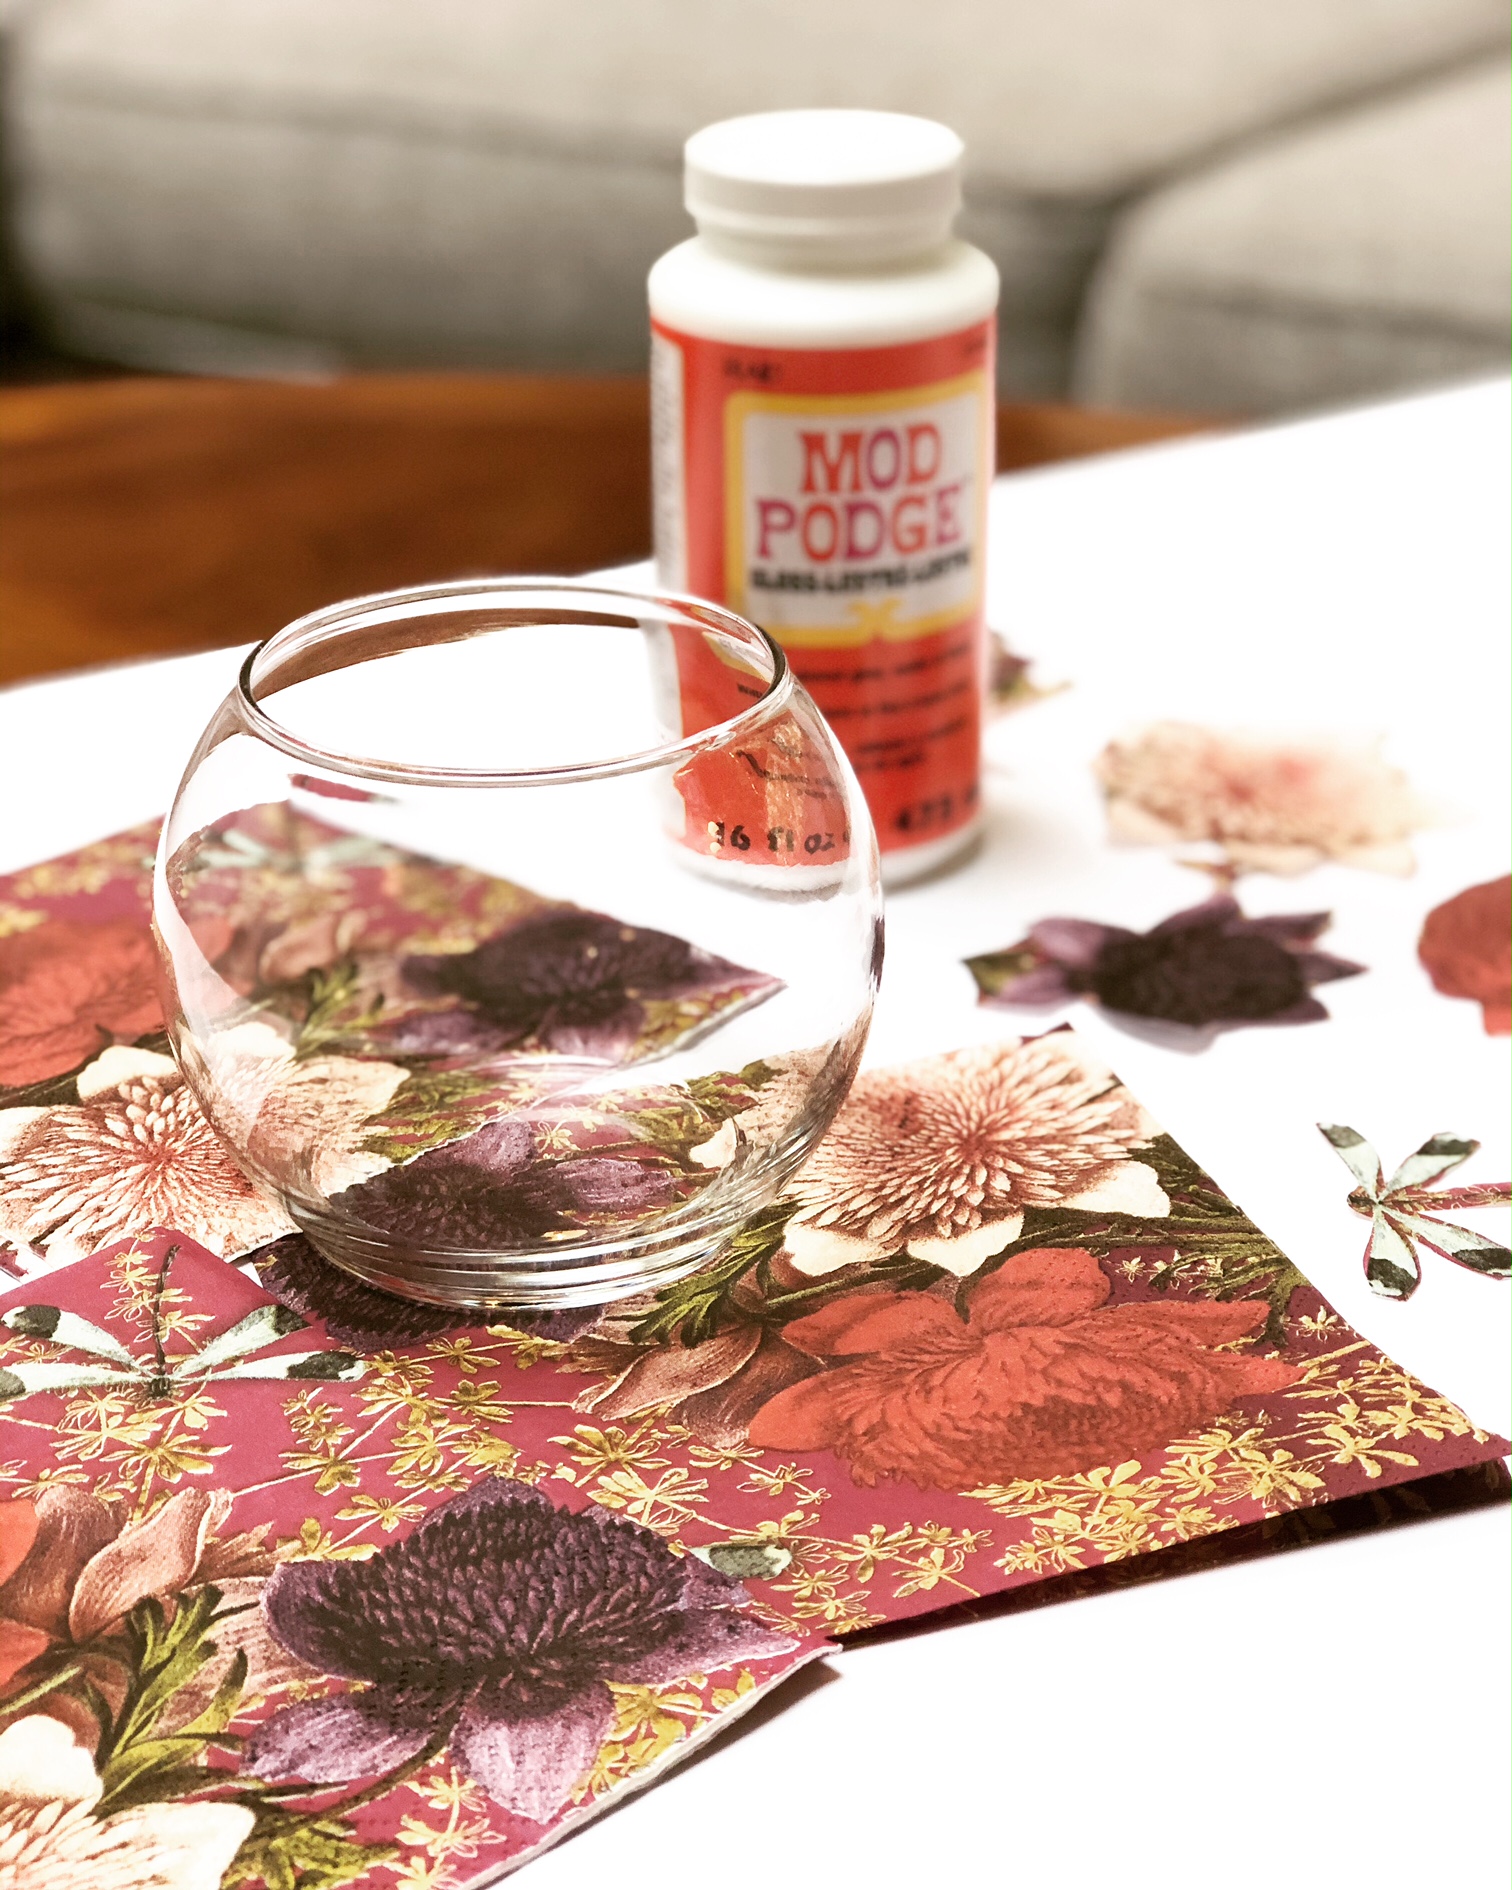
Here are the supplies you will need~
The first step in doing this craft is to collect all of your supplies and to find a napkin or napkins that will incorporate the look you are going for. I wanted a sophisticated opaque look but, a cute fun look would be exciting, too, especially for kids. Think about a design that might look nice with light passing through it. I found these napkins at a specialty garden center in my area. They seemed to fit the bill for me.
When you find the napkin you want to use, you will then need to separate the two layers of the napkin as you can see below. The bottom layer usually is mostly white but, it may have a very light impression of the design of the napkin. I still used the white layer to create the look I wanted. Don't throw away anything. You might find you will need something unexpected as you go.

Next, I hand tore the bird pictures out of the napkin. Tearing the edges allows for the design to feather into the Mod Podge. I also tore strips in jagged pieces out of the white underlayer of the napkin. I also tore smaller pieces of the branches and greenery designs on the napkin, as well, allowing myself all sorts of options as I went along.
Lay out the different torn designs so that they will be at your fingertips, ready to be applied to the vase when you get to that point.
I used the white dove shown below on one of the vases but, to be honest, it didn't show up well when I was done with the whole process. Perhaps, the layers of Mod Podge were too thick for that particular bird design.
The next step is to pour some of the Mod Podge into a smaller container. I used a plastic Dixie cup.
With a small foam brush apply a liberal amount of Mod Podge to the outside of the vase. Now is the time to decide which major design of the napkin you would like to add to the vase. This is where imagination comes in. You want to have a vague idea of where you would like to place the largest images you are going to use. That way you can fill in other areas with the other smaller designs moving around the vase and in small sections.
I started with the jagged edged white strips and put them in a criss-cross pattern. Then I added a little more Mod Podge and placed one of the birds slightly over and to the side of the criss-cross white strips. I also shook some glitter onto the wet Mod Podge. To be honest, I am not sure you need to add the glitter here. Applying it solely on the last step might be all you need, although my votive holders ended up being quite sparkly! I guess it is a matter of preference. I am kind of a glitter girl. I don't even mind if it hangs around the house for a while :).
Go around the glass vase in the same manner adding different designs as you go. You can make it as uniform or as scattered as you would like. It is your vision, after all!
Make sure the paper designs are totally adhered to the vase with the Mod Podge. Try to make sure the edges are laying flat and that there are no apparent air bubbles. You can continue to sprinkle glitter, if you'd like or wait until the last step.
When you have gone all the way around the vase and are happy with how it looks. Let it sit a while until the first layer of Mod Podge is dry. Next in small sections, apply another layer of Mod Podge with the foam brush, sprinkling glitter on the wet Mod Podge as you go all the way around the vase. Now, let the vase totally dry. It may take a few hours to be dry enough to handle without messing up the designs.
As usual with me, I didn't take many photos as I was doing this project (I always get totally into what I am doing 😊) but you can see below how I placed the different images on the vase.
This was how the vases looked when the Mod Podge was all dry. You can see, the look isn't as blotchy as it was before the Mod Podge was totally dry..
And, this is how the votive candle holders looked lit up with candles. I filled the bottom of the vases with Epsom salts and added a votive candle. I think another idea would be to use one of those timed battered-powered string of mini lights instead of the candles. That way every night they will light up your home without you even thinking about it. I might run out today and purchase a few sets!
I really like how these votive candle holders turned out. So much so, that I think I will make some to give away at Thanksgiving~a way to usher in the Christmas season :).
Happy Crafting!
We were Featured! Yay!!
Joining These Link Parties:


I paid a lot of money to buy a similar Christmas votive holder last year. I'm so excited to see your tutorial on how to make my own for a lot less money. So pretty!
ReplyDeleteThank you, Marie. I am happy to hear you enjoy my post :).
ReplyDeleteOh, I love these Christmas votives, they are so pretty! I especially like how you made the votives look like frosted glass - have to try this!
ReplyDeleteThank you, so much. I gave away a few as gifts for Thanksgiving. They were really fun to make. Happy Thanksgiving!
DeleteVery pretty votive. Thanks for sharing. I am happy to feature you on Sunday at Love Your Creativity.
ReplyDeleteThat is awesome, Linda! Thanks so much! I am thrilled :).
DeleteWow! I love the pretty votives you made. You made it looks so easy and festive for the holidays.
ReplyDeleteThank you so much! You are so sweet! Happy December!
Delete