Why Not Try a Basket for a Container?

I had some extra flowers left over from my Art-in-Bloom Evening and wondered what I could do with them.  And then, I found this basket!
 
The first thing I did was find soda bottles, the one liter size.  I find that size works well in these open container arrangements. Three of them were used here. Next, with a razor blade (be very careful) cut the top off of the bottle, trying to judge the right depth for your desired basket or container.  Next place the bottles in the basket and carefully add water.  I lined the bottom of the basket with paper to cushion the soda bottles and to make them stay in place.  Now, arrange the flowers to your heart's content!  Play with colors and textures.  It's always fun and you really can't make a mistake with flowers, can you? I thought this arrangment looked like it had come from the farmer's market.  You can tie on a handmade tag with ribbon, if you'd like.  It adds a nice touch.
 
For a little bit of money (these flowers came from Trader Joe's and a local grocery store) you can make someone's day and bring them a pretty and uniquely arranged bouquet of flowers.  If you can't think of anyone, you can always enjoy them yourself!
 

Art-in-Bloom

Art-in-Bloom!
Well, I think that Wednesday's "Art-in-Bloom Evening" was a success.  We had a great time visiting, sharing some food and arranging flowers inspired by Monet's paint The Grand Canal 1908.

After all the supplies were neatly arranged, we sat down to nibble on some yummy appetizers, as well as sipping on white wine.  It was a lovely way to start the evening.


I started the presentation with my example of an art-in-bloom design.  This painting is The Golden Islands 1892 by Henry Edmund Cross.  The painting was basic and interesting all at the same time, making it enticing to interpret.  As you can see I used flowers in a layering effect to represent the painting.  The beige container represented the bottom beige layer; orange astroemeria mixed with catmint (from my garden) the next layer; blue/white hydrangea and blue delphinium represented the main part of the painting with baby's breath mixed in to mimick the white dots; and finally orange astroemeria was added to simulate the hue at the bottom of the painting. 

Next it was time to start the fun and let the guests create their own masterpieces!  Among the supplies used were, of course, flowers,  oasis, various containers to choose from, blue painted sticks from my yard, bbq skewers, markers and clippers.  All to be used however the guests chose.


                                     Having fun designing!


Originally I wanted to use cardboard display boards to cause a separation among the designers so no one could see what the other designer was doing but, it was a very hot night and all the windows in the home needed to be open.  The boards kept falling over from the wind.  So, I nixed that idea.  The designers were so into making their own creations that they didn't have time to see what the others were doing.  It worked out very well.  All the designs came out very different from one another.


Some of the finished products!


Isn't it interesting to see the different ways people interpret the same painting?  This is the fun part for me, seeing all kinds of creativity.

Proud floral designers!


Now for my funny little coincidence!  I created a powerpoint presentation to show an actual museum art-in-bloom.  I wanted all participants to know what I was talking about.  So, I used some photos I had taken in April at the Boston MFA Art-in-Bloom.  Unbeknownst to me, the same painting I had chosen from an art book I borrowed from my local library was the same painting that the MFA had chosen to be interpreted!  Honestly, it was totally coincidental!
  Now, you have to realize these designers have much, much more experience and many more resources with which to work than my little art-in-bloom workshop has but, I think my designers did a pretty good job, considering!


All-in-all it was a very successful night.  I was able to try out my idea for a night of fun, food and flowers with friends and family, a safe place for me.  I was able to work out the kinks and mechanics of the workshop with friends, while, at the same time, receiving constructive input, a vital part of the whole process.  There's a strong possibility I will be marketing my "Art-in-Bloom Evening" to the general public in the near future.  Should be fun!
Again, I'll keep you posted!

Shade Garden Coming Along!


Here's the shade garden that I posted a few weeks ago.  It is filling in nicely.  The red begonias and blue lobelia are getting bigger.  I love the bright colors together. The lady's mantle is in bloom now.  The snapdragons are growing taller but haven't blossomed yet.  When they do, that should really make a difference for the overall look of the garden.

It's funny how each year things can be so different with perennials.  I have had years when my Jacob's Ladder has been beautiful and full, really lovely.  However, this year there are only a few spindly blossoms on a few stems. You can see the tiny blue/purple flowers in between the magenta foxglove in the back of the garden.  It's disappointing but, the harsh winter may have had something to do with the Jacob's Ladder poor performance.  Not much you can do about that!


My beloved browallia isn't really making a show yet but, it will. The cleome will make its move soon and grow up in between the the foxglove and the Jacob's Ladder.  The plan is for the cleome to bloom just as the foxglove and Jacob's Ladder are pretty well finished.  Hopefully, my garden plan will work.  I'll let you know what happens!

Getting Ready for My Art-in-Bloom Event

Tonight I am getting together with some friends and family to try out my new idea for a workshop/party idea I am developing.  Tonight it is called an "Art-in-Bloom Evening".  This is an idea I have come up with after visiting the Boston MFA's Art-in-Bloom event for the past four or five years.  The museum hosts it every spring and I believe I read somewhere that the first museum to hold such an event was the Boston MFA in 1974.  Many other cities now host art-in-bloom events, as well.  I visited Philadelphia's show several years ago and enjoyed it very much also.  It's always interesting to see how other cities present a common idea.

If you don't know what art-in-bloom is, here is a very basic definition.  It is the process of interpreting a piece of art, such as a painting, sculpture or any type of art you choose, with flowers and other floral material.

My art-in-bloom event is just for fun, not at all as intense as a museum art-in-bloom.  I want to offer clients an opportunity to invite their friends for an evening or afternoon; perhaps, enjoy some refreshments and then play around with flowers in an artistic way!  Tonight is my test drive before offering the idea to the public.

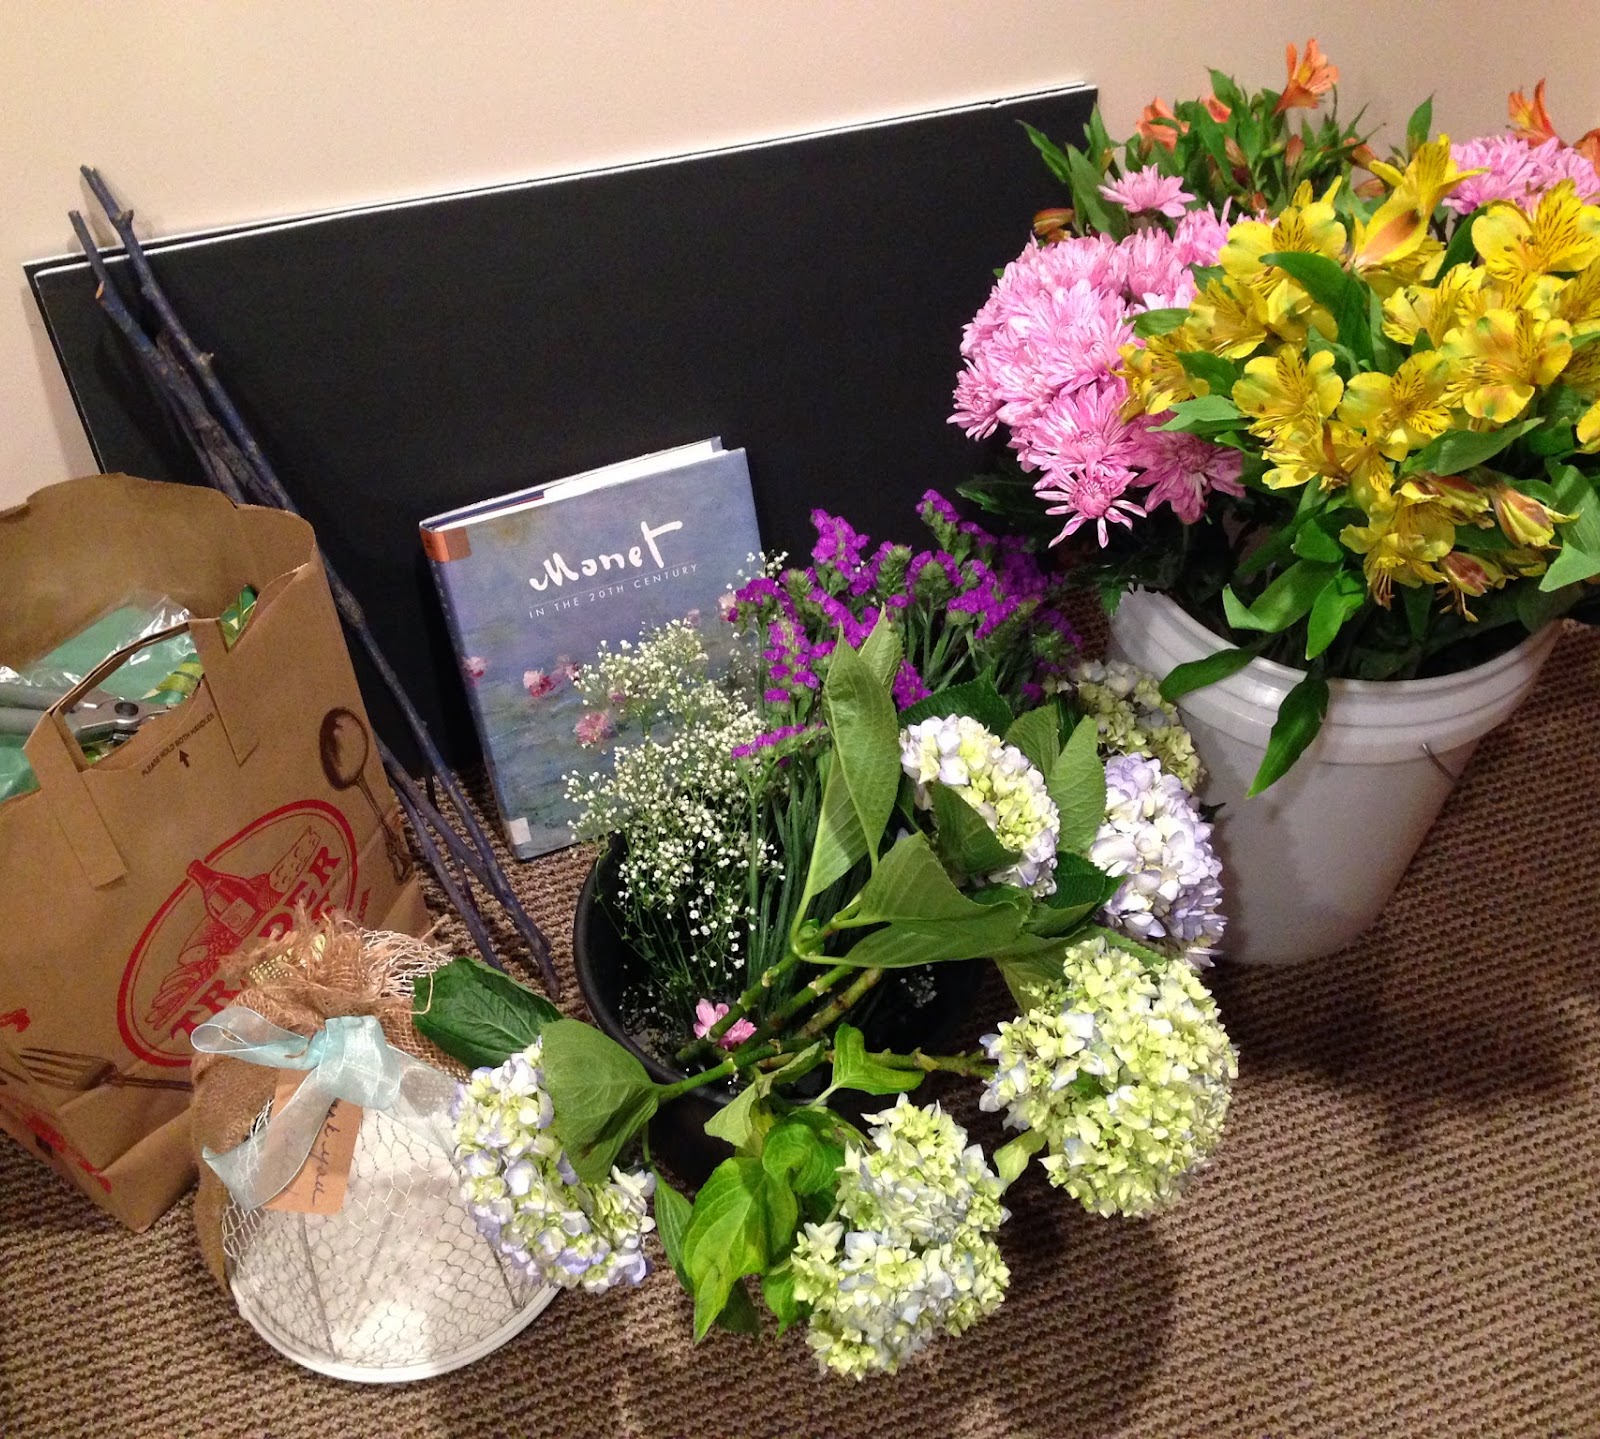
The picture below shows some of the materials I will be bringing to my friend's home.   As you can see there are flowers, oasis, clippers, a Monet art book and a "thank you" gift for my friend, along with other materials.  I'm hoping to get some good photos of tonight's party to share with you!  Keep your fingers-crossed that all goes well!
 

Love of Gardening


     "The love of gardening is a seed once sown that never dies."
                                                      ~Gertrude Jekyll

A Fun Entertaining Idea

I found the idea for this colorful snack or appetizer in an old grocery store flyer.  I was about to throw it away when I saw the recipe for these cute "floral bouquets".   Do you see the cucumber flowers?  It was suggested that these "bouquets" would be good for a child's snack.  I thought they would be great for adults also.  You could use them as a healthy appetizer for guests who are trying to "be good" or, perhaps, these individual bouquets could serve as your first course.  It's a neat way to have the salad course taken care of while allowing you to easily serve the main meal when everyone is seated at the dining table.  These individual snack cups seem to be a trend.  Another idea to try-- individual layered dip with tortilla chips.  That sounds good too!


The ingredients for this "bouquet" are celery, red pepper, orange pepper, baby carrots, cucumbers, cherry tomatoes (I had to use grape tomatoes.  They were out of the cherry ones at my grocery store.) and spinach leaves.  I used Kraft Classic Ranch Dressing, the no fat version.  It was delicious but, you could use any dressing you choose.
These little salads certainly add color to the buffet table! 

Summer Container Gardens


Just want to remind everyone that Mitchell & Company Designs and Events will make container gardens for your front entry, patio or anywhere you want to add some color!


French Country Floral Arrangement


I couldn't help myself!  I found these flowers at Trader Joe's and I couldn't help but make an arrangement out of them!  The flowers are purple Stocks, white Snapdragons and yellow Alstroemeria.  I just love the color combination and the arrangement smells heavenly!  My daughter thought it looked French Country and I had to agree with her.


My Shade Garden


I have been working hard on getting my flower beds planted.  I have two flower beds on the side of the house which are very shaded, as well as the side deck which also needs shade-loving plants.  It is very difficult every year to find flowers to plant in these gardens, especially since I am somewhat obsessed with blue in the garden.  When I say blue I really mean a blue-purple because it is very difficult to find a true blue in flowers, especially shade plants.  However, there is a plant called browellia that I love to use in this shade garden.  By mid-summer, these plants are 12-14 inches tall and have little starlike blue flowers all over the plant.  It adds that touch of "blue" I love!
This is how the garden started.  It has been weeded.  Three plants of Lady's Mantle, three Jacob's Ladder, two Foxglove and two little plants of Fever Few have all miraculously survived the tough winter.

Here I have added two more Jacob's Ladder, four Foxglove and two Lady's Mantle to the perennials in the garden.  As for annuals, the front row consists of red begonias.  The second row is blue Lobelia.  The third row is made up of red and yellow Snapdragons.  Mixed in with the perennials are six deep purple Cleome.  I know, I know.  Cleome needs sun but I am going to try it anyway.  I've tried the Snapdragons before in this garden and they seem to manage in the shade.


At this point, I hadn't found Browallia yet.  I am so obsessed with it I had to travel to an Agway store on Cape Cod, which is two hours away from my house, to find Browallia in six-plant flats.  I was visiting my mother at the time and I knew this Agway carried my favorite shade-loving "blue" plant.  (I later found some flats of it at a local nursery in my area.  I hope I remember this next year!  Of course, I love visiting my mother and that Agway!  I may make the trip anyway!)
I planted the Browallia in between the blue Lobelias.  I am not sure how long into the summer the Lobelia will last.  Most of the time it has died on me by the Fourth of July.  Let's see how long they last this year.  I love the dantiness and blue color of Lobelia but, as I said, it has been hard for me to keep going.  I may be looking for a new filler in a month.  We'll see.

The garden doesn't look very colorful at this point but give it a few weeks and it should be thriving and filling in nicely.


Oh, and yes, that is dreaded bittersweet on the fence.  I have it all over my yard and I have been trying to pull and cut it out all over the place.  It's a monumental task.  I decided to cry "Uncle" and let the bittersweet stay on the fence.  I should paint the fence but haven't yet, so, I'll let the bittersweet cover the fence...for now.   I am going to try to train it and trim any stragglers.  I hope I haven't made a huge mistake by letting it stay!
 
I'll let you know how my shade garden looks in a few weeks!